Public Key Authentication–What it is and how to use it?
What it Public Key Authentication?
Public Key Authentication (PKA) is more secure way to authenticate to a server than using passwords. Using username/password authentication method, you prove your identity using password but if the server is hacked, an attacker can learn your password. Public Key Authentication solves this problem.
In PKA, you generate a key pair, consisting of public key, which everybody is allowed to know and private key, which should be kept secret. Private key is able to generate signature and anybody who has your public key can verify that particular signature is genuine.
After you generated key pair, public key is copied into server while private key is stored on your local machine. When the server asks you to verify your identity, client generates signature using your private key, server can verify your signature and allow you to login. If the server is hacked or spoofed, attacker only gets your one signature. As signatures cannot be reused, an attacker gains nothing.
How to use it?
WinSCP is excellent open source tool to transfer files using FTP, SFTP, FTPS and SCP for windows. In this article, I will explain how to setup WinSCP for Public Key Authentication (PKA)
- Download WinSCP from site (http://winscp.net/eng/download.php)
- From login dialog box, click ‘Tools’ to open ‘PuttyGen’ application

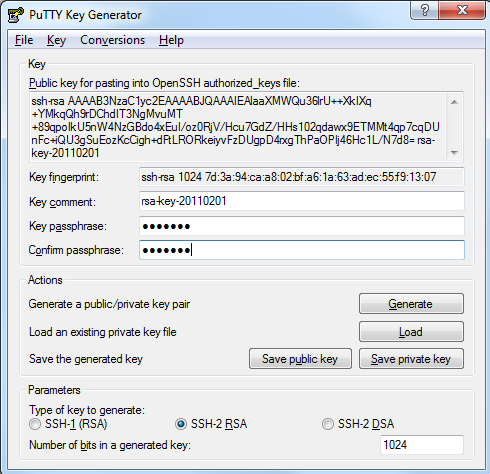
Click ‘Generate’ button to generate a public/private key pair. Enter valid values for ‘Key Passphrase’ and ‘Confirm Passphrase’ fields and remember passphrase values. Now, you can save public and private key by clicking respective buttons on the screen.
- Send public key to your system administrator to include your keys into authorized list
- From WinSCP login dialog box, enter hostname, username and port no (if different from 22). Instead of using password authentication, click ‘Advanced’ button, go to ‘SSH/Authentication’ and select ‘Private Key File’ from your system

- If you are going to connect to this server, click ‘Save as’ to save the details.
- Now click ‘Login’ to login into SFTP server. When prompted to enter ‘passphrase for private key’, enter passphrase generated earlier using ‘PuttyGen’ application